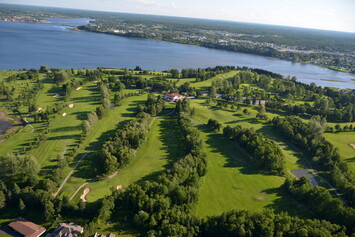
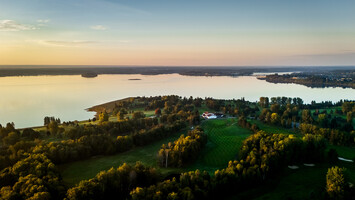
Course Walkthrough
Course Walkthrough
 View our Scorecard

1Hole # 1 - Par 4
A relatively easy starting hole par four measuring 331 yds from the black tee with a dog leg right movement. Best played with an iron to the 100 yard marker. The risk reward to the green from the tee for the long hitters is not a high percentage shot.

4Hole # 4 - Par 4
A medium length par four at 394yds that plays straight away. Guarded by bunkers both sides of the green with a nasty fairway bunker on the left side of the fairway for short hitters and another further up on the left for long hitters. Stay in the center for best approach to green.

7Hole # 7 - Par 4
A medium length par four 360 yds that bends to the left. A nice draw off the tee is the ideal shot for right handers but stay in the middle as there are severe fairway bunkers on the right and trees to the left. The green is well guarded with bunkers on the front right and both sides protecting a sloping green back to front.

2Hole # 2 - Par 5
A straight away par five only 488 yds long but plays longer. The fairway is bordered by bunkers to the left and a water hazard to the right which requires a straight drive. The left side of the fairway is a much better angle to approach the green as there is a bunker and large trees guarding the green on the right. The green is severely sloped and 3 putts are very common.

5Hole # 5 - Par 4
A short 343 yd par four that only needs a fairway metal or long iron to the 100 yard marker. The hole can be reached by very long drive but usually makes the second shot more difficult as the green is quite small and narrow. A good birdie opportunity for most players.

8Hole # 8 - Par 5
A good dog leg left 492 yard par five that favours the long hitter. The fairway is well bunkered on both sides and requires a well placed tee shot. This is a birdie hole for your best players, a very reachable green on the second shot but bunkered on the front right and to the left with a series of pot bunkers.

3Hole # 3 - Par 3
An excellent par three at 173 yds with a prevailing head wind. The green is guarded by a bunker on the front right which catches a lot of shots.

6Hole # 6 - Par 3
A very strong 220 yd. par 3 that requires accuracy as the entrance to this green is narrow. Well bunkered on both sides and par is a good score.

9Hole # 9 - Par 4
A difficult dogleg to the left par four that requires a very accurate tee shot as there is major trouble on both sides. The approach shot into the green is also tricky as the green is perched on a knoll and guarded by a front pot bunker. The green slopes sharply from back to front. Par is a good score here.

10Hole # 10 - Par 4
The start to one of the best back nines you will play anywhere is quite fair. A good drive in the middle leaves a fairly short approach to a bowl shaped green with a unique raise in the center. Get a par here because it just keeps getting tougher from the next whole on.

13Hole # 13 - Par 4
This hole is well known for it's difficulty. A long par four from an elevated tee to a severely sloped left to right fairway and a long shot from a side hill lie to an elevated green makes this hole memorable. The green is narrow with a high sloping bank to the left that will kick your approach shot into the green but on the right side there is major trouble with a lateral hazard.

16Hole # 16 - Par 4
Another beautiful view of the harbour from this tee makes the score secondary. A short par four that actually plays longer and requires a good approach shot. The drive is quite generous in landing area but the narrow green comes with a well protected very deep bunker to the front and right requiring skill to escape.

11Hole # 11 - Par 5
This is a tight tree lined hole requiring accuracy but can be easily reached in two by good players. The small green is well protected by bunkers all around. This hole can produce some big numbers if you stray into the dense tree lines.

14Hole # 14 - Par 5
A very picturesque par five that is bordered by the Bathurst Harbour all the way down the right side. The fairway plays through a valley and then over a hill and down to a small green sloped steeply from back to front. Stay below the hole on this green or count on a three putt.

17Hole # 17 - Par 3
This signature hole will test the best of players including professionals. The green is very long and narrow with a hogs back shape to it. The hole usually plays into the wind and driver off the tee is not uncommon. Take bogey and run on this tiger of a hole!!

12Hole # 12 - Par 4
This is one of the finest golf holes you will see anywhere. A dogleg to the right requiring a shot from the tee to be shaped left to right will give ideal position for shot to the green. The fairway is sloped severely from the left to the right causing an awkward stance for the approach shot. The green is tripled tiered and very tricky to read. A great hole and four is very good.

15Hole # 15 - Par 3
This is an exqisite little par three that is similar to #7 at Pebble Beach. A postage stamp sized green with a typical stiff wind makes accuracy essential. Miss this green and deep pot bunkers all around will test your skill to the limit.

18Hole # 18 - Par 4
A fine finishing hole with trees on the right all the way to the green. The entrance to the green is obstructed if you are right of the center line on your drive and if you get to far left you may find a water hazard or more tree problems. The green has a back level which offers a great tournament pin location. If you shoot par or better on this back nine consider yourself an expert golfer.